Honest, this is really really easy to do.
Why would I do this?
As developers we, sooner or later, find ourselves wanting to add some clever custom shape to our application user interface. SwiftUI provides basic shapes like ellipse, rectangle and rounded rectangle and also the ability to produce a more complex shape in code but no tools to do that. Yes, SVG or PDF will definitely do the job if you need resolution independent graphics and you can certainly drop in a PNG if you don’t need to worry about scaling artifacts but all of these options have a couple of drawbacks.
Size: Even the simplest PDF or SVG is a text file with the coordinates of the control points stored as text. SVG is pretty sparse but even a simple ellipse saved as a PDF is going to cost you seven or eight kilobytes. More complex shapes are going to be even worse.
Even though the code to create a SwiftUI Shape is also text in a swift file, it’s important to remember that that file is compiled down to a set of binary instructions in the compiled app and therefore is likely to be quite a bit smaller.
Versatility: A SwiftUI Shape can be easily rotated, scaled, skewed etc. and it can have complex shading and stroking applied to it. Also a single shape can be reused in code with different transformations and shading for each instance.
Security: Image files like SVG, PDF, PNG etc. are in your application bundle as files and can be copied out of the apps bundle. This is particularly easy in MacOS apps. A shape that is compiled into the applications code can’t be borrowed.
What do I need to do this?
As has been suggested by other writers in these forums there are a number of tools and utilities that, used together, can get you from a bezier shape to a SwiftUI code snippet to do a shape in code. But it turns out that there is a little known and highly underrated app on the Mac App Store called DoodleCAD that will do the whole job from start to finish with relatively easy to use tools in just a few steps.
The one catch is that you can do all the drawings you want in DoodleCAD for free for as long as you want but you cannot export or print anything without paying a small monthly subscription (about the cost of a mocha at Starbucks or a half hour at minimum wage). There is, of course, a free one month trial period and you can easily cancel the subscription after that.
How do I do this?
Here’s the problem you need to solve. You want to add the letter “A” as a shape to a view in your SwiftUI app so that you can render it with a custom gradient fill and a stroke. You would like a SwiftUI.Path for this but even a simple shape like an ellipse has difficult geometry to write as code on your own. Here’s the steps in DoodleCAD
- Open DoodleCAD to a new canvas
- Select the text tool – the “T” on the toolbar
- Click drag a box on the canvas for that text, make it pretty big.
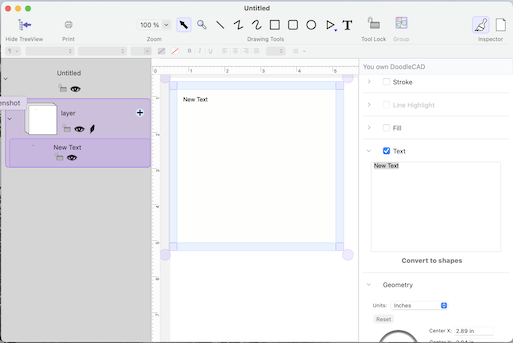
- In the text inspector in the panel on the right (you might have to expand it) type “A”
- Select the text in the inspector and in the windows text properties on the top left of the window select the font and size you want. I used 96 point Noteworthy since it’s kind of a fun font.
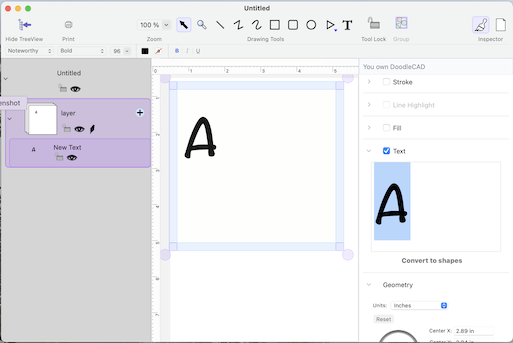
- Expand the box around the text if some of it is obscured.
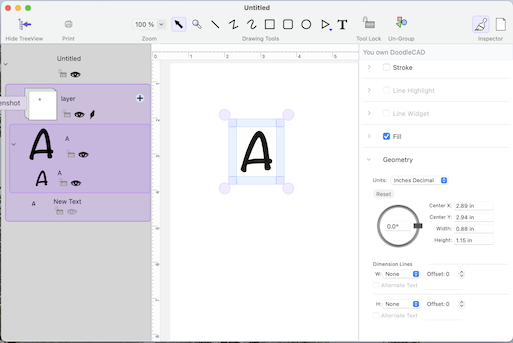
- Right click on the the text box on the canvas and at the bottom of the contextual menu click “Text Element” -> “Convert to Path Group”
- DoodleCAD creates a group containing a shape for each of the characters in the text even if it’s a single character so you will want to ungroup it by clicking the little ungroup button in the toolbar. You might have to unselect and reselect to get the toolbar to update. The original text will still be there so you might want to delete it to avoid confusion.
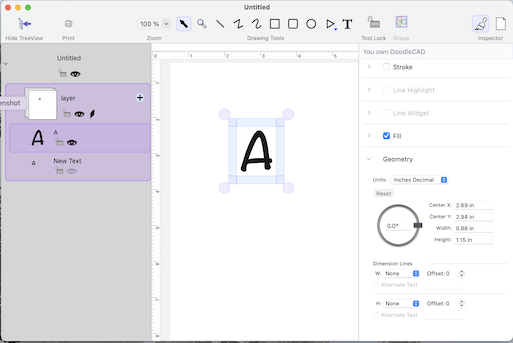
- Scale and rotate the shape however you want and also, if you want, you can edit the path one vertex at a time.
- Select the shape and then click in the menu bar File -> Export to … -> SwiftUI Path …
- Even without a subscription you can see the code snippet that was generated and if you want to use it just click the “Copy to Clipboard” button that appears if you have a subscription (or free trial).

- Just create a new Swift file in your Xcode project with a struct or class that can hold the code and paste the snippet in.
- You’re done.
The code looks like this:
// SwiftUI Code for A
@ViewBuilder
var a: some View {
SwiftUI.Path { path in
path.move(to: CGPoint(x: 42.24, y: 39.92))
path.addCurve(
to: CGPoint(x: 38.80, y: 43.84),
control1: CGPoint(x: 42.24, y: 42.48),
control2: CGPoint(x: 41.09, y: 43.79)
) … and so on
Conclusion:
With a minimum of fuss you can draw a complex shape and export it as a SwiftUI Path code snippet.